Turn a USB printer into a network printer with Proxmox
Posted on
Contents
I consider printers to be an “essential luxury.” You don’t need it most of the time, but when you need it, you wish you had one at home. Going through a bout of this many times, I decided to splurge on a printer purchase and scoured the marketplace for a nice, basically un-used USB only printer for $20 (Brother HL-L2300D). It was such a nice deal and it was fun to be able to print anything right from your laptop. However, needing a laptop meant the inconvenience of transferring things to your laptop and then being finally able to print. Very high “transaction cost”.
I have a small mini PC running Proxmox which is basically my homelab for various services. I decided to figure out a way to have this printer connected to this server and be able to print from my network. And, thankfully, it wasn’t that bad. Basically, pass-through the device to a small VM, run CUPS, and use CUPS to share the printer over network. When this all worked, it was like magic. I could print from any computer and even phones without configuring really anything. In the midst of AI craze, I even created a “Send me a letter” service that would let my friends type in messages and it would print messages directly to this printer. Nothing is as fun as being able to interact with the physical world. Anyway, if you want to do the same with one of your dumb printers, you can follow along the steps below:
Find the printer on the host
Turn the printer on first, then run lsusb on the Proxmox host.
root@proxmox:~# lsusb
[...]
Bus 001 Device 004: ID 04f9:0061 Brother Industries, Ltd HL-L2300D series
[...]
We need this 04f9:0061, the vendor:product ID, for the passthrough.
Create a Linux VM
Any Linux will do, I went with Ubuntu 24.04 because the community script does all the bootstrapping work necessary: https://community-scripts.org/scripts/ubuntu2404-vm
Use cloud-init to set the password and the network, DHCP should be fine.
Pass the USB device through to the VM
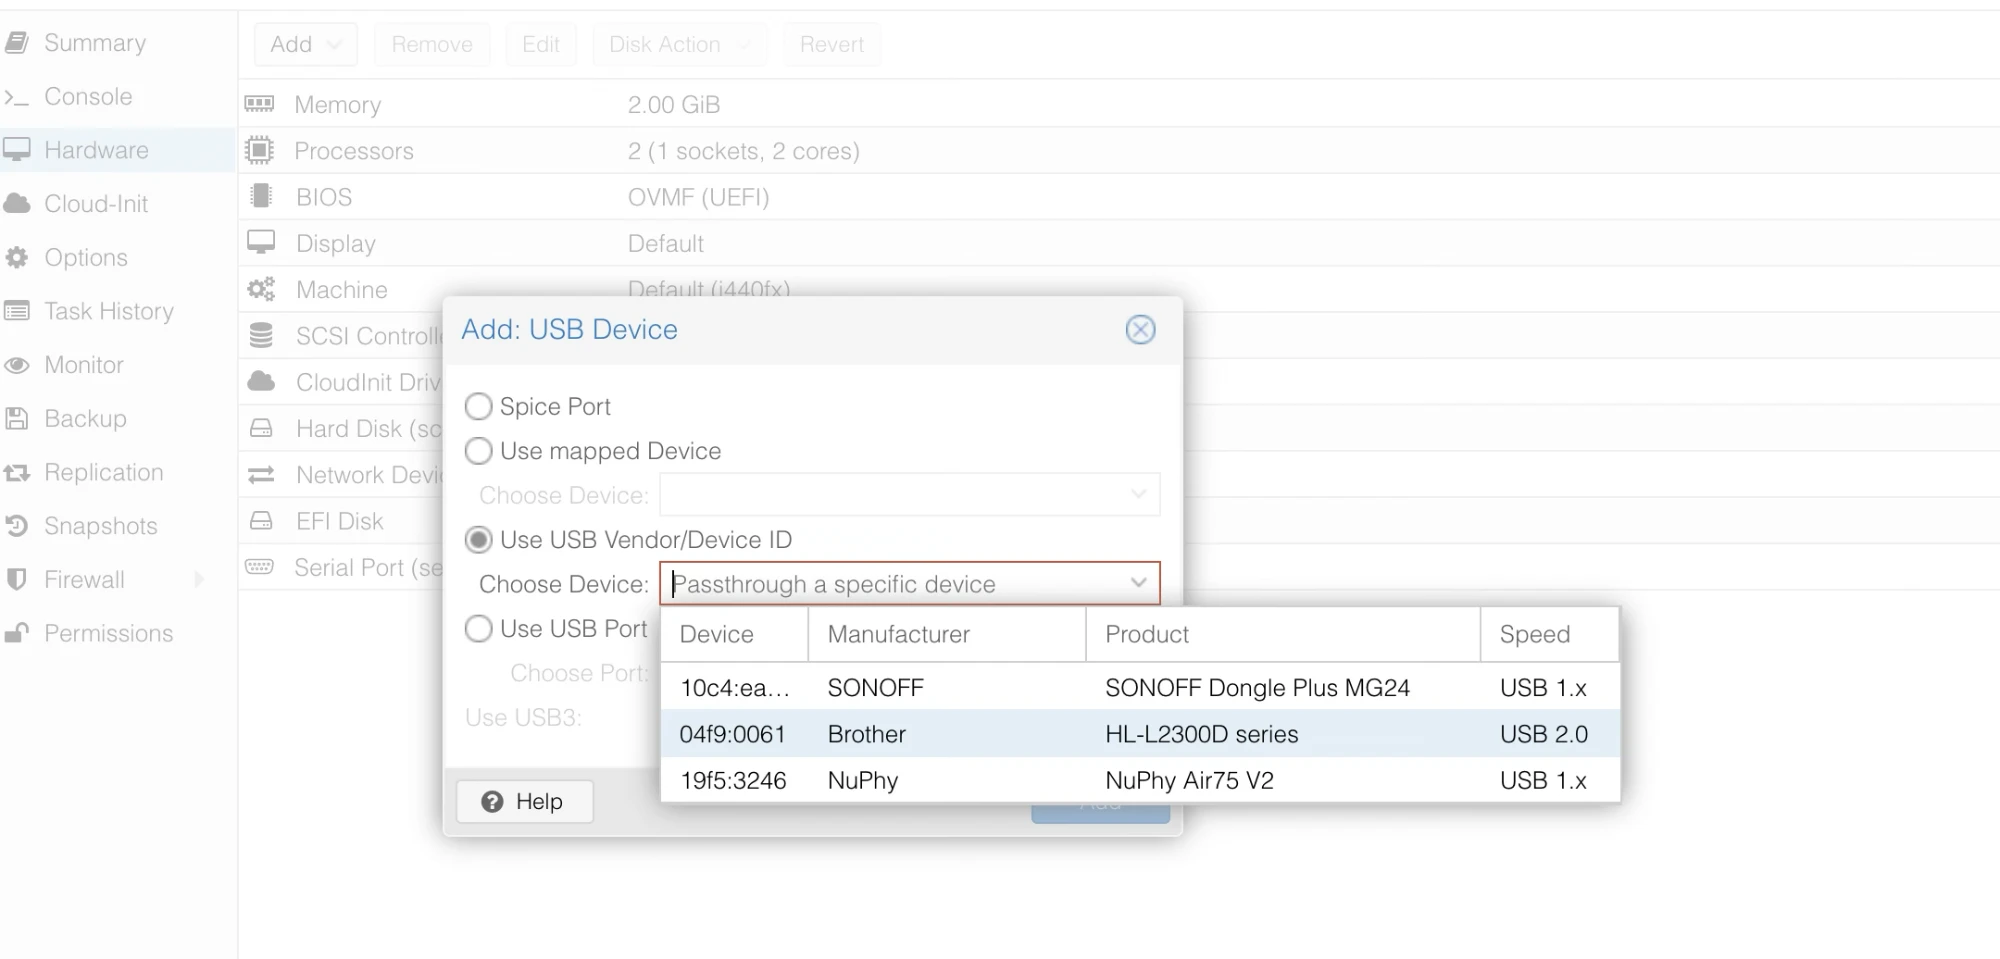
VM → Hardware → Add → USB Device → Use USB Vendor/Device ID → pick the Brother 04f9:0061.
Install CUPS in the VM
 1sudo apt update
 2sudo apt install \
 3  cups \
 4  cups-client \
 5  cups-filters \
 6  cups-ipp-utils \
 7  printer-driver-brlaser \
 8  avahi-daemon \
 9  avahi-utils \
10  ghostscript \
11  poppler-utils
One thing to note here is that printer-driver-brlaser is the driver for the Brother laser. You might need to search around to find the right driver for your printer. Apart from CUPS, we are installing avahi-daemon which is what makes the printer discoverable on the network.
User Configuration
After CUPS is installed above, add yourself to the lpadmin group so you can administer CUPS:
1sudo usermod -aG lpadmin $USER
Group change needs a re-login to take effect.
Confirm the printer is visible in the VM
Inside the VM shell, run the following:
root@ubuntu:~# lpinfo -v
network beh
network ipps
serial serial:/dev/ttyS0?baud=115200
network http
network lpd
network socket
network ipp
network https
direct usb://Brother/HL-L2300D%20series?serial=U63878C2N839617
The direct usb://... line is the printer, so this confirms that the passthrough worked. That URI is what CUPS uses to address it.
Open CUPS up to the network
By default CUPS only listens on localhost, which is no good if the whole point is printing from other machines. Edit /etc/cups/cupsd.conf:
 1LogLevel warn
 2PageLogFormat
 3MaxLogSize 0
 4ErrorPolicy retry-job
 5# Allow remote access
 6Port 631
 7Listen /run/cups/cups.sock
 8# Share local printers on the local network.
 9Browsing On
10BrowseLocalProtocols dnssd
11DefaultAuthType Basic
12WebInterface Yes
13IdleExitTimeout 60
14<Location />
15  # Allow shared printing...
16  Order allow,deny
17  Allow 192.168.8.0/24
18</Location>
19<Location /admin>
20  AuthType Default
21  Require user @SYSTEM
22  Order allow,deny
23  Allow 192.168.8.0/24
24</Location>
25<Location /admin/conf>
26  AuthType Default
27  Require user @SYSTEM
28  Order allow,deny
29  Allow 192.168.8.0/24
30</Location>
31<Location /admin/log>
32  AuthType Default
33  Require user @SYSTEM
34  Order allow,deny
35  Allow @LOCAL
36</Location>
This changes the following:
Port 631— listen on all interfaces, not just localhostBrowsing On— advertise the printer on the networkAllowin the<Location>blocks — let machines on your subnet reach the print queues and the admin interface
Check the config parses before restarting anything:
root@ubuntu:~# sudo cupsd -t
"/etc/cups/cups-files.conf" is OK.
"/etc/cups/cupsd.conf" is OK.
Then turn on sharing and restart:
1sudo cupsctl --share-printers
2sudo systemctl restart cups
Add the printer in CUPS
The web interface is on port 631 of the VM:
https://192.168.8.106:631/admin
Log in as your regular user - the one you added to lpadmin earlier. Root works too, but avoid it if you can.
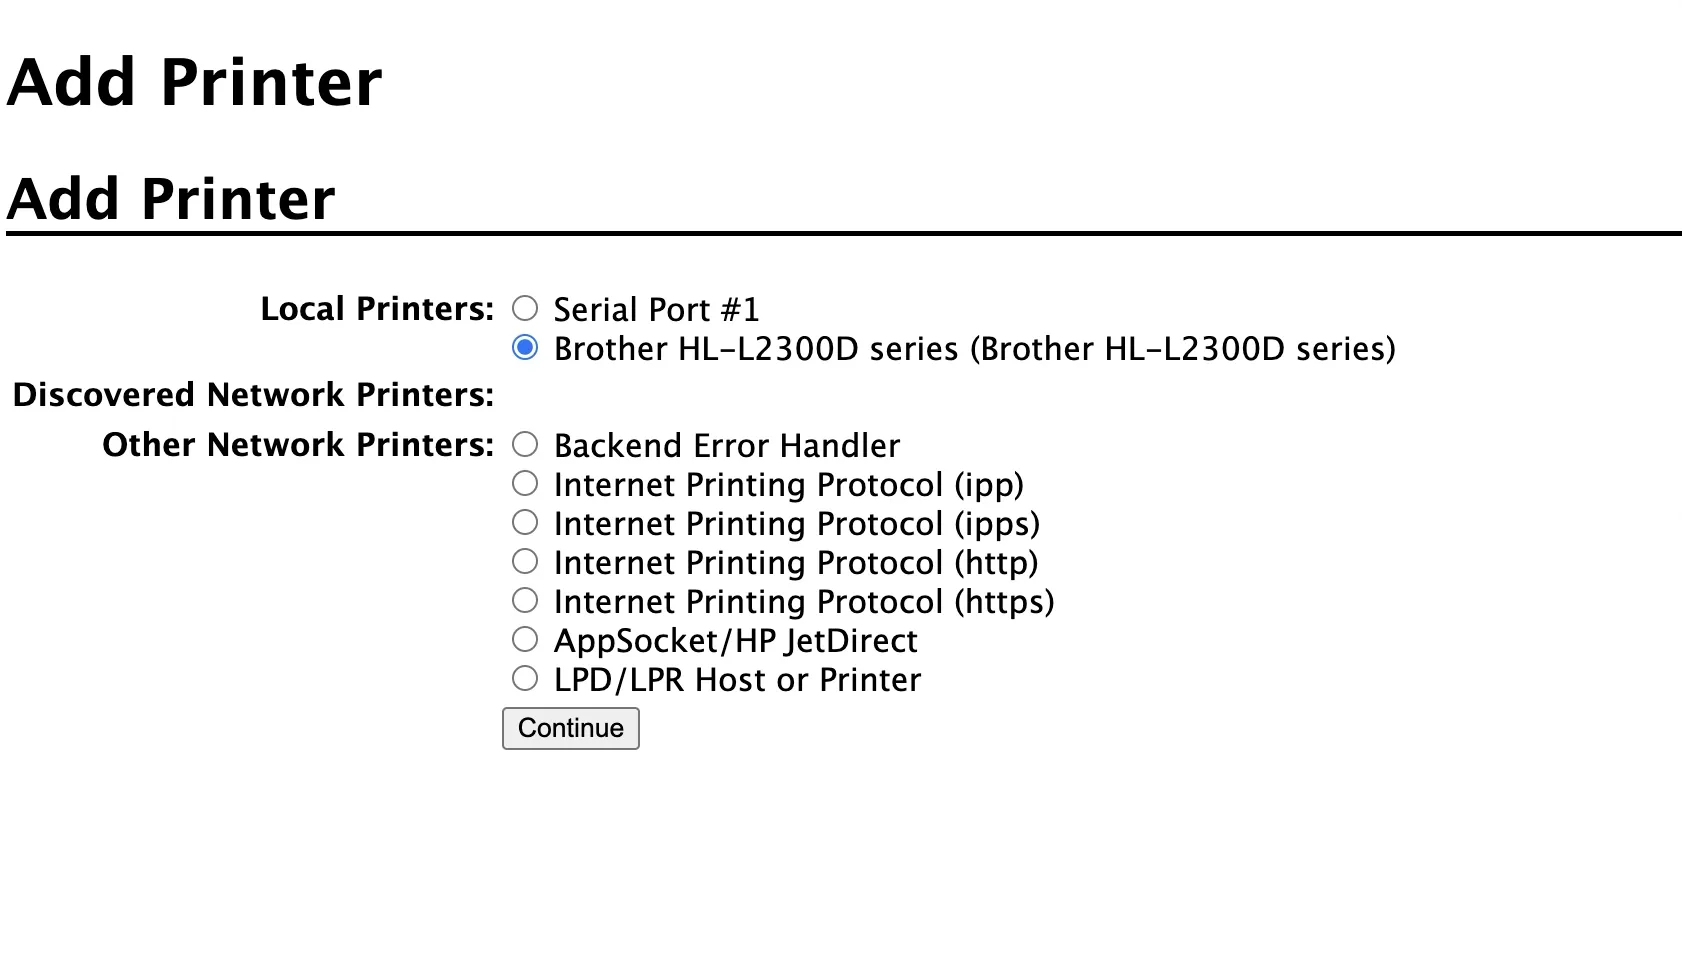
Administration → Add Printer.

The Brother shows up under Local Printers, because as far as the VM is concerned it’s a locally attached USB printer.
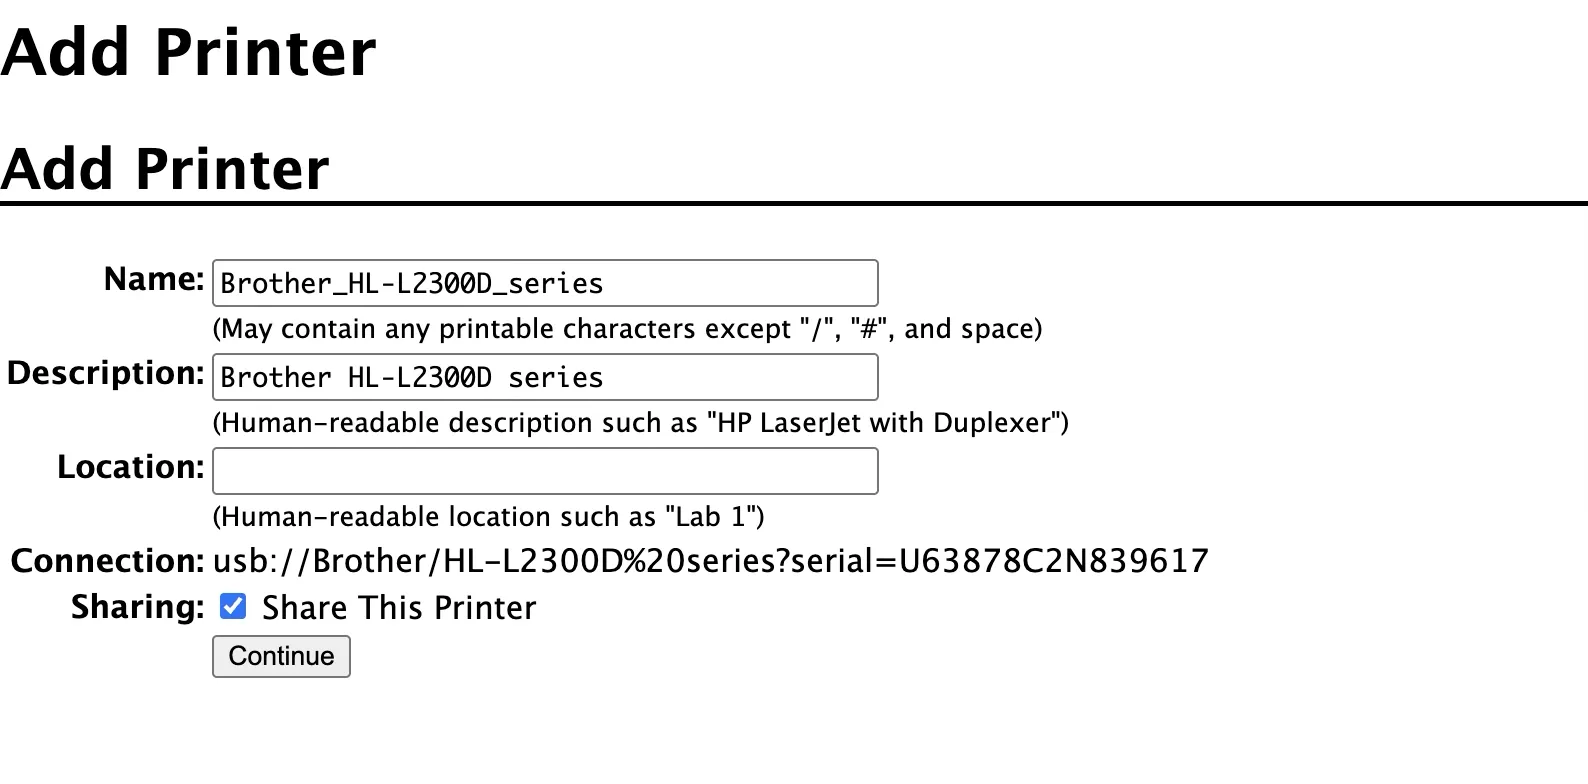
Name it, and check Share This Printer. The connection URI is the same usb:// one from lpinfo -v.
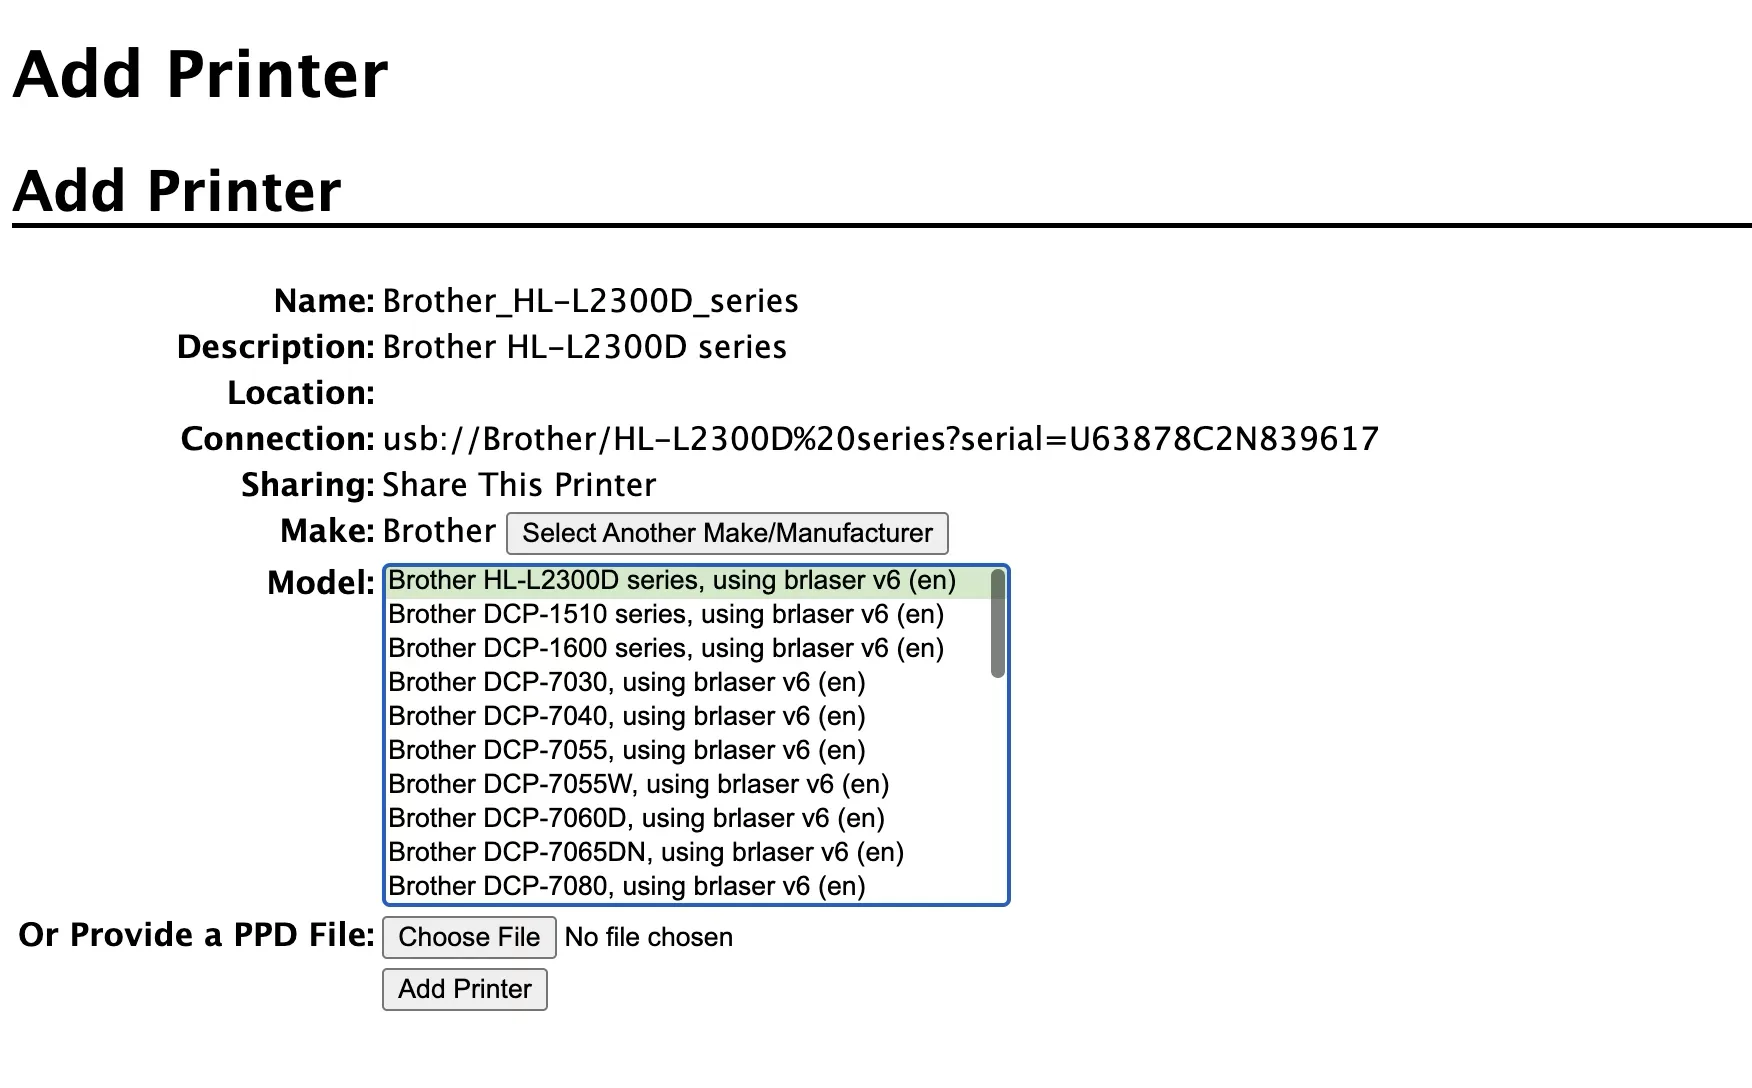
Then pick the make and model. Mine is Brother HL-L2300D series, using brlaser v6 (en), which comes from the printer-driver-brlaser package we installed earlier.
After this is complete, the printer queue now lives at:
https://192.168.8.106:631/printers/Brother_HL-L2300D_series
Check the printer is being advertised
On the VM, to confirm mDNS is working, run the following:
root@ubuntu:~# avahi-browse -rt _ipp._tcp
+   eth0 IPv6 Brother HL-L2300D series @ ubuntu             Internet Printer     local
+   eth0 IPv4 Brother HL-L2300D series @ ubuntu             Internet Printer     local
+     lo IPv4 Brother HL-L2300D series @ ubuntu             Internet Printer     local
=   eth0 IPv4 Brother HL-L2300D series @ ubuntu             Internet Printer     local
   hostname = [ubuntu.local]
   address = [192.168.8.106]
   port = [631]
   txt = ["printer-type=0x1056" [...] "rp=printers/Brother_HL-L2300D_series" "qtotal=1" "txtvers=1"]
That’s the printer advertising itself over Bonjour, which is what lets clients on the same subnet find it without being told an address. rp=printers/Brother_HL-L2300D_series is the queue path we need if we ever add it manually.
Test the queue directly
Avahi and mDNS don’t cross subnets, so from a different subnet you point at the IP and check IPP answers:
1ipptool -tv ipp://192.168.8.106:631/printers/Brother_HL-L2300D_series get-printer-attributes.test
This lets you verify the connection and is useful for debugging cross-subnet issues.
Add it on a Mac
Now that this is complete, the printer should be automatically visible in the “Default” tab of the Mac printer dialog. If you are crossing subnets, you can add it by hand:
Printers → Add → IP tab:
- Address:
192.168.8.106 - Protocol: Internet Printing Protocol - IPP
- Queue:
printers/Brother_HL-L2300D_series - Use: Generic PostScript Printer
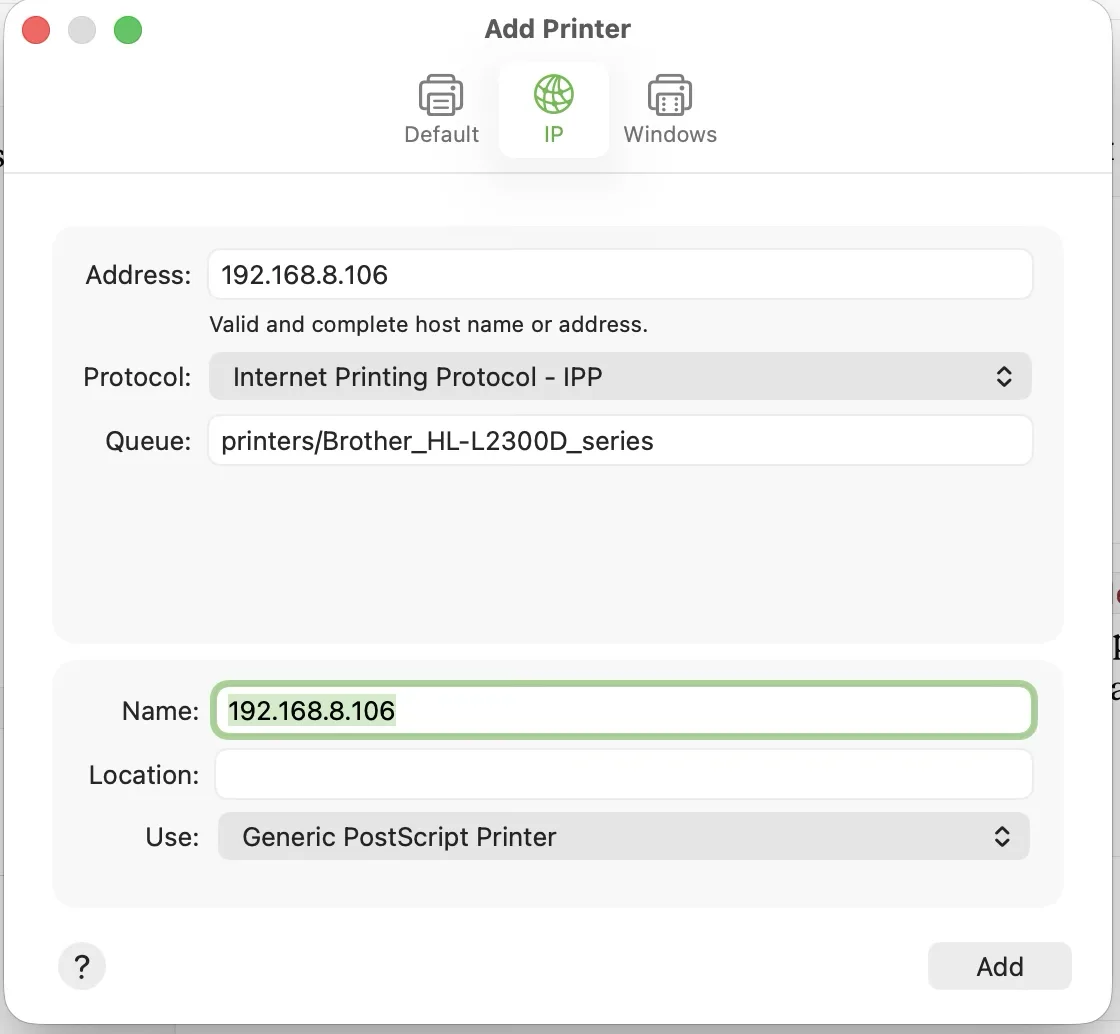
The printers/ prefix on the queue matters — it’s the resource path, the same rp= value that shows up in the mDNS record above.
We just made a dumb printer “smart”.